
Press release
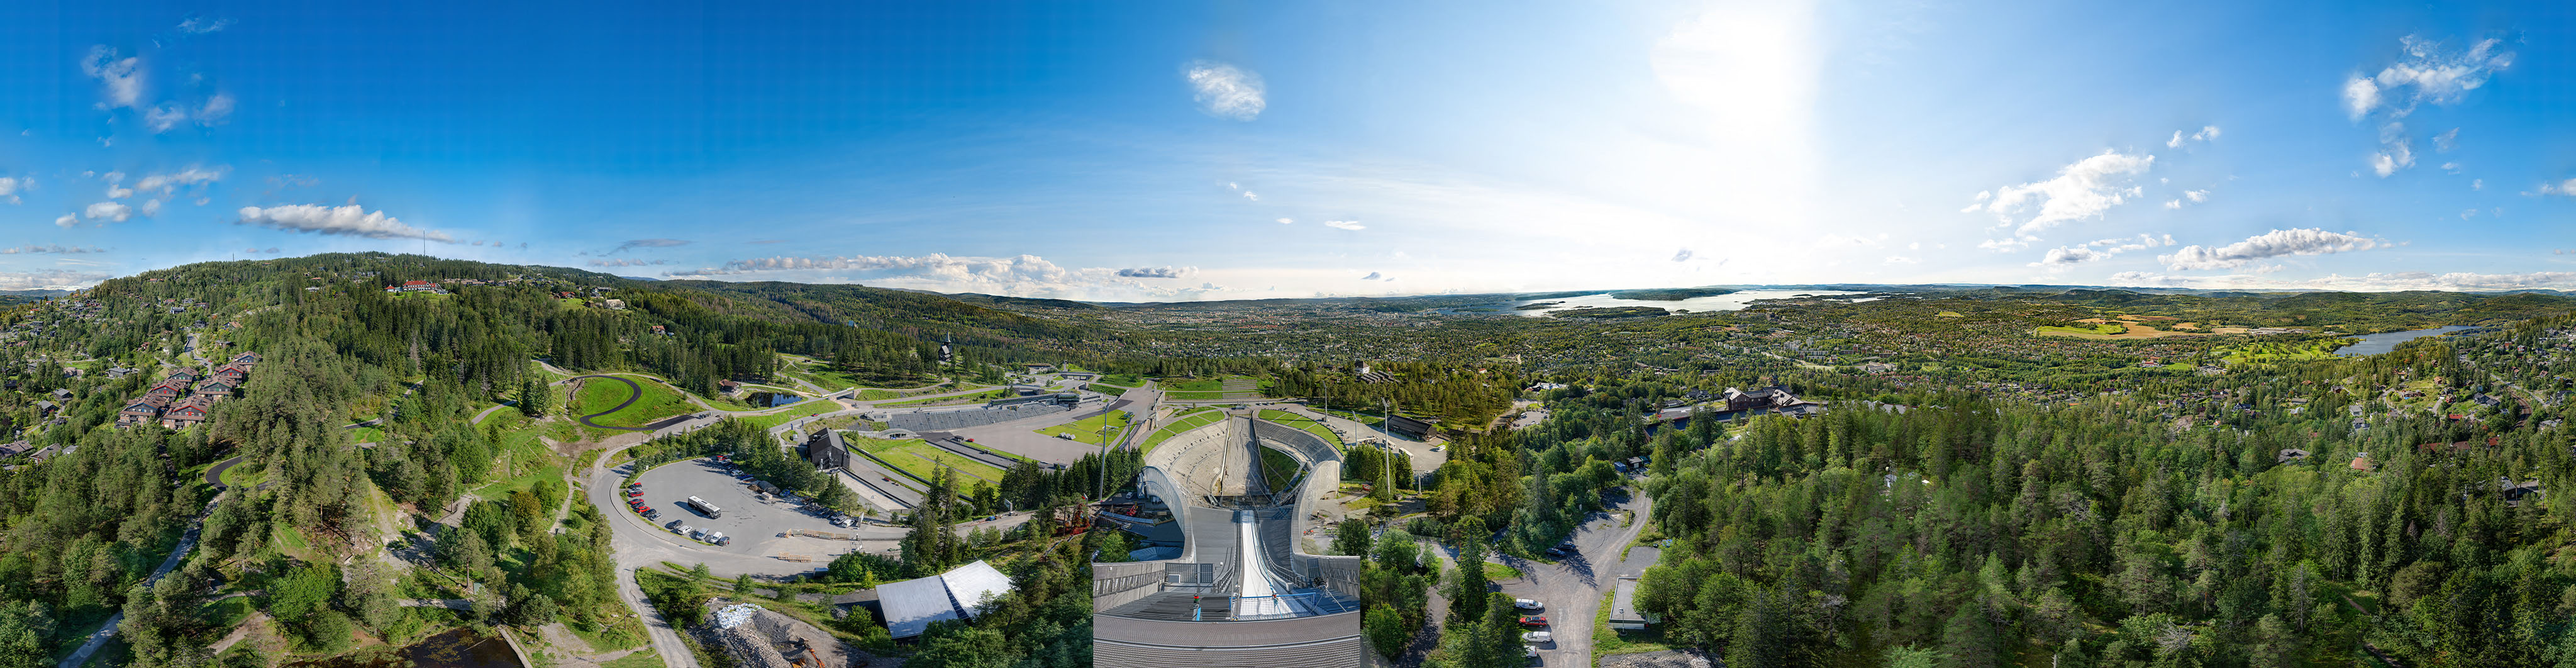
World Record Panorama: Oslo Captured in 2.05 Terapixels
Oslo, Norway – November 5, 2025 – Oslo has been immortalized in what is believed to be the largest panoramic image ever produced. The finished panorama measures 2.05 terapixels (2 297 216 × 891 702 pixels) and occupies roughly 6 TB in uncompressed 8-bit TIFF format. Documentation has been submitted for official world record verification. For context, the previous world record, set in 2013, measured 846 gigapixels—less than half the size of the Oslo panorama.
Built from 366 843 carefully chosen photos (12.3 TB RAW) collected over 4 days from Holmenkollen Ski Tower. The project blends detailed field photography with powerful computational work. Each frame was shot using up to 20 exposures per image, aligned at sub-pixel precision, processed by custom-built software, and finally stitched to deliver a seamless 360° glimpse of Oslo — from fjord to skyline — in unprecedented detail.
About the project
- Scope: 500 000+ captures, 366 843 used in the final panorama.
- Workflow: Median stacking, sub-pixel aligning, optical-flow correction, AI-driven upscaling, multi-threaded GPU rendering.
- Timeline: One year of research/prototyping/building camera rig, four days of capture, one month of image preparation, 2 weeks of RAW development, 2 weeks of intensive processing, 2 weeks of final rendering; and approximately two months of post-processing. Some of the steps repeated several times.
- Infrastructure: Over 50 TB of fast NVMe/RAID scratch storage, 160 TB of archival storage, 100 Gbps networking, and a workstation running dual RTX 4090 GPUs at full load for weeks.
Putting 2 terapixels in human terms.
- Resolution: 2 048 432 101 632 pixels—roughly 2 terapixels, or more than 2 000 gigapixels.
- Full HD comparison: It would take one million 1920×1080 displays to show the image all at once.
- Distance metaphor: Laying each 1×1 cm pixel end to end reaches enough distance to circle Earth 511 times or touch the Moon 53 times.
- Screen equivalence: Displaying the panorama at native resolution on standard monitors would demand a screen about 650 × 250 meters—covering 23 FIFA soccer fields.
- Benchmark: The world’s largest camera module (Vera C. Rubin Observatory) produces 3 200 megapixels per shot. This panorama is 626 times larger.
- Time comparison: Inspecting one pixel per second would take about 65 000 years—longer than recorded human civilization.
Media content
Feel free to download media content from here: https://holmenkollen360.com/media/press-release/
Experience it
Explore the full 360° panorama here: https://holmenkollen360.com
Quote
“This 2.05 terapixel panorama sets a new world record—Oslo has never been seen like this before, and no other city on Earth has ever been captured at such unprecedented scale”, says the team behind the panorama.
Acknowledgments
Thanks to Oslo Kommune Bymiljøetaten for granting us access to Holmenkollen Ski Tower to carry out this project.
Media contact
Marek Rzewuski
Email: marek@holmenkollen360.com
holmenkollen360.com
World Record Panorama: Oslo Captured in 2.05 Terapixels
Oslo, Norway – November 5, 2025 – Oslo has been immortalized in what is believed to be the largest panoramic image ever produced. The finished panorama measures 2.05 terapixels (2 297 216 × 891 702 pixels) and occupies roughly 6 TB in uncompressed 8-bit TIFF format. Documentation has been submitted for official world record verification. For context, the previous world record, set in 2013, measured 846 gigapixels—less than half the size of the Oslo panorama.
Built from 366 843 carefully chosen photos (12.3 TB RAW) collected over 4 days from Holmenkollen Ski Tower. The project blends detailed field photography with powerful computational work. Each frame was shot using up to 20 exposures per image, aligned at sub-pixel precision, processed by custom-built software, and finally stitched to deliver a seamless 360° glimpse of Oslo — from fjord to skyline — in unprecedented detail.
ABOUT THE PROJECT
SCOPE: 500 000+ captures, 366 843 used in the final panorama.
WORKFLOW: Median stacking, sub-pixel aligning, optical-flow correction, AI-driven upscaling, multi-threaded GPU rendering.
TIMELINE: One year of research/prototyping/building camera rig, four days of capture, one month of image preparation, 2 weeks of RAW development, 2 weeks of intensive processing, 2 weeks of final rendering; and approximately two months of post-processing. Some of the steps repeated several times.
INFRASTRUCTURE: Over 50 TB of fast NVMe/RAID scratch storage, 160 TB of archival storage, 100 Gbps networking, and a workstation running dual RTX 4090 GPUs at full load for weeks.
PUTTING 2 TERAPIXELS IN HUMAN TERMS
RESOLUTION: 2 048 432 101 632 pixels—roughly 2 terapixels, or more than 2 000 gigapixels.
FULL HD COMPARISION: It would take one million 1920×1080 displays to show the image all at once.
DISTANCE METAPHOR: Laying each 1×1 cm pixel end to end reaches enough distance to circle Earth 511 times or touch the Moon 53 times.
SCREEN EQUIVALENCE: Displaying the panorama at native resolution on standard monitors would demand a screen about 650 × 250 meters—covering 23 FIFA soccer fields.
BENCHMARK: The world’s largest camera module (Vera C. Rubin Observatory) produces 3 200 megapixels per shot. This panorama is 626 times larger.
TIME COMPARISION: Inspecting one pixel per second would take about 65 000 years—longer than recorded human civilization.
MEDIA CONTENT
Feel free to download media content from here: https://holmenkollen360.com/media/press-release/
EXPERIENCE IT
Explore the full 360° panorama here: https://holmenkollen360.com
QUOTE
“This 2.05 terapixel panorama sets a new world record—Oslo has never been seen like this before, and no other city on Earth has ever been captured at such unprecedented scale”, says the team behind the panorama.
ACKNOWLEDGMENTS
Thanks to Oslo Kommune Bymiljøetaten for granting us access to Holmenkollen Ski Tower to carry out this project.
Media contact
Marek Rzewuski
Email: marek@holmenkollen360.com
holmenkollen360.com
Verdensrekord: Oslo i 2,05 terapiksler
Oslo, 5. november 2025 – Oslo er fotografert i det som antas å være verdens største panorama. Det ferdige bildet er på 2,05 terapiksler (2 297 216 × 891 702 piksler) og opptar rundt 6 TB som ukomprimert 8-bit TIFF. Dokumentasjon er innsendt for offisiell verifisering av verdensrekorden. Til sammenligning var rekorden fra 2013 846 gigapiksler – under halvparten av Oslo-bildet.
Panoramaet er satt sammen av 366 843 nøye utvalgte bilder (12,3 TB RAW), fotografert over fire dager fra hopptårnet i Holmenkollen. Prosjektet kombinerer klassisk panoramafotografering med tung bildebehandling: opptil 20 eksponeringer per bilde, subpiksel-justert og skalert opp med formål å øke oppløsningen og minimere støy. Alt dette med egenutviklet programvare – og til slutt sømløs sammensying til et 360°-panorama, i en detaljrikdom vi aldri har sett før.
Om prosjektet
- Omfang: 500 000+ eksponeringer; 366 843 er med i sluttbildet
- Arbeidsløp: median-stacking, subpiksel-justering, optisk-flyt-korreksjon, AI-oppskalering, flertrådet GPU-rendering
- Tidslinje: ca. 1 år med av/på testing/prototyping av algoritmer og utvikling av kamerarigg; 4 dager fotografering; 1 måned klargjøring; 2 uker RAW-fremkalling; 2 uker tung prosessering; 2 uker slutt-render; rundt 2 måneder etterarbeid (flere av disse stegene er gjentatt inntil)
- Infrastruktur: 50+ TB rask NVMe/RAID-scratch, 160 TB arkivdisk, 100 Gbit nettverk, arbeidsstasjon med to RTX 4090 som har kjørt kontinuerlig i ukevis.
2 terapiksler – satt i perspektiv
- Oppløsning: 2 048 432 101 632 piksler – over 2 000 gigapiksler
- Full HD: Skulle man ha vist alt samtidig, trengs det én million 1920×1080-skjermer
- Avstand: Hvis en pixel hadde vært 1x1cm stor og man la de ende mot ende, så rekker det rundt Jorden 511 ganger eller til Månen 53 ganger
- Skjermflate: I full oppløsning tilsvarer det flate på ca. 650 × 250 meter – omtrent 23 FIFA-fotballbaner.
- Målestokk: Vera C. Rubin-observatoriets kameramodul tar 3 200 MP per bilde; dette panoramaet er 626 ganger større
- Tid: Hadde man tittet på en piksel i sekundet så måtte man bruke mer ennn 65.000 år for å gå gjennom hele bildet – det er 13x lenger enn hele menneskelige sivilisasjonen, som antas å være ca. 5000 år.
Se og last ned
- Pressefiler: https://holmenkollen360.com/media/press-release/
- Opplev panoramaet her: https://holmenkollen360.com
Sitat
«Dette 2,05-terapiksel-panoramaet setter ny verdensrekord. Oslo er aldri vist slik før – og ingen annen by på kloden er noen gang fanget i så stor skala,» sier teamet bak prosjektet.
Takk
Vi retter en stor takk til Oslo kommune / Bymiljøetaten for tilgang til annlegget i Holmenkollen. Denne tilgangen har vært en sentral forutsetning for gjennomføringen av prosjektet og resultatene som presenteres.
Pressekontakt
Marek Rzewuski
marek@holmenkollen360.com
Tlf: 95209764
holmenkollen360.com
The image
About the team
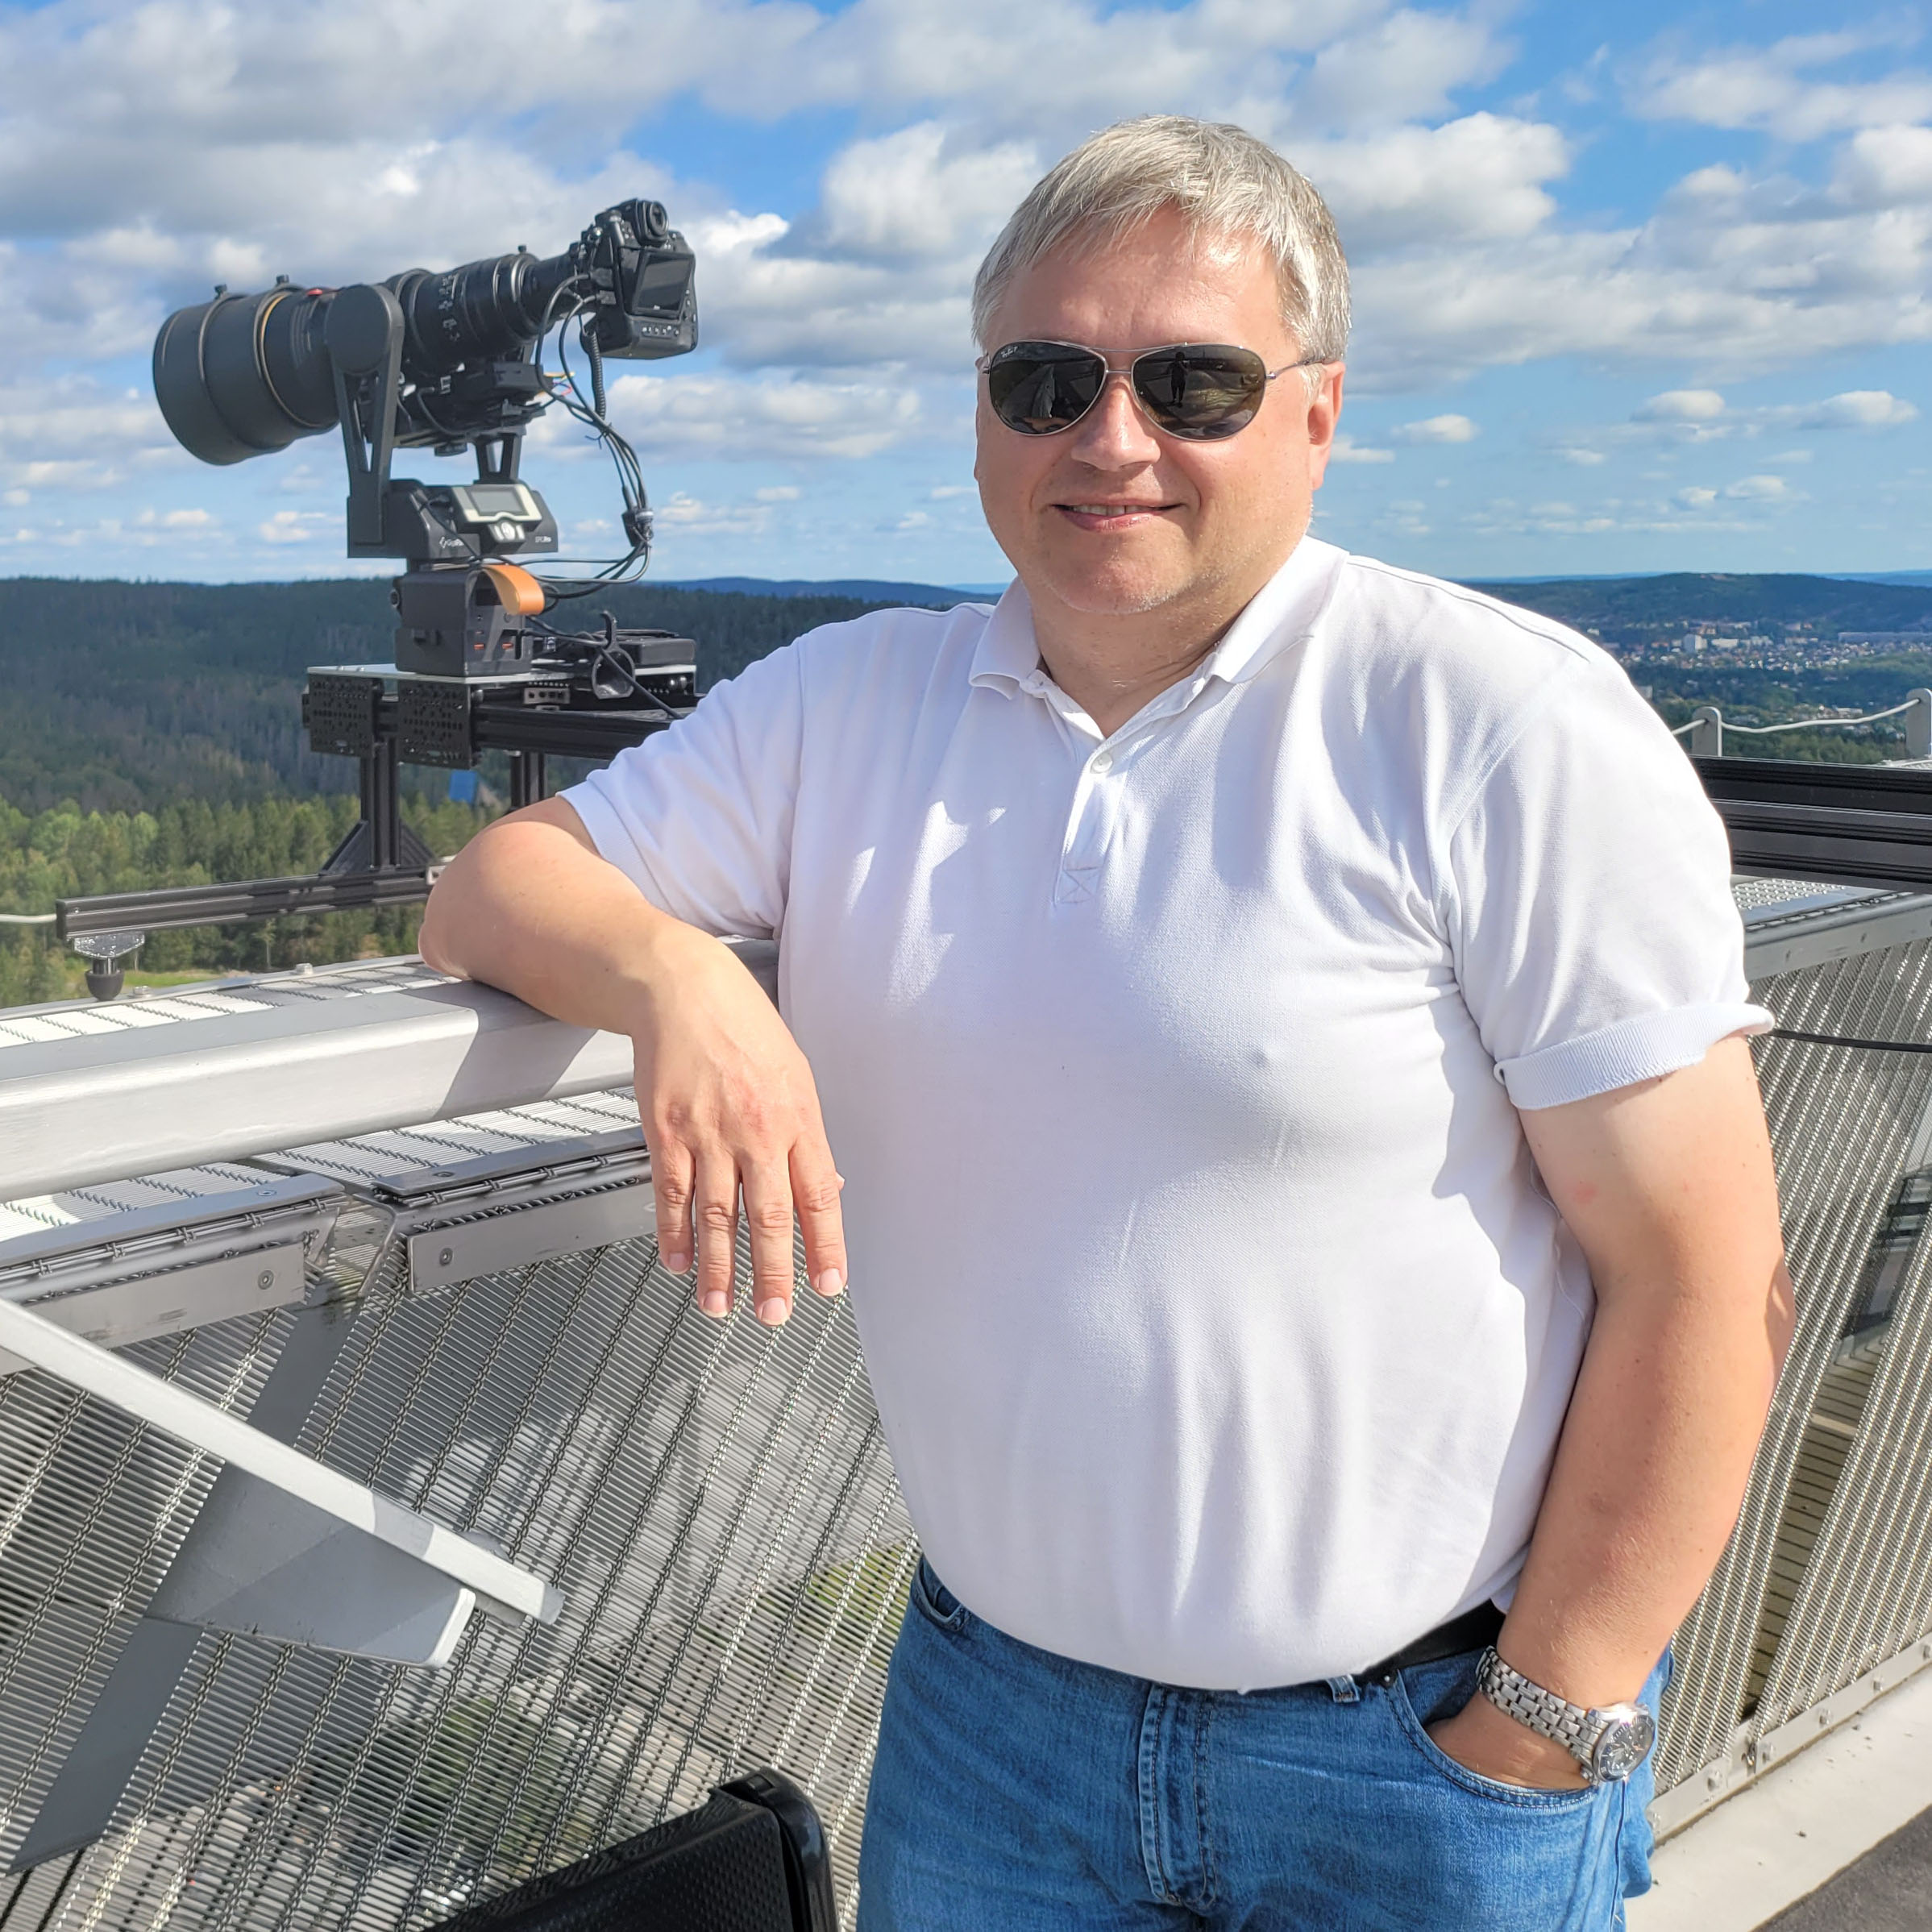
Marek Rzewuski
Skilled programmer with passion for computer graphics and photography. Running his own business, creating web-pages with focus on speed, security and clean design. Common tasks: coding custom solutions, hosting and operations, performance optimization, photography, simple video work, and customer support. Some experience in PCB design and programming using LoRA/WIFI/BLE.

August Rzewuski
Aircraft technician apprentice. Passionate about drones, planes, computers, photography and he spends all his spare time as a horseracing jockey, helping to train horses. Curious, solution-oriented and always ready to help. He is the kind of colleague you can openly discuss ideas with and together find smarter solutions.
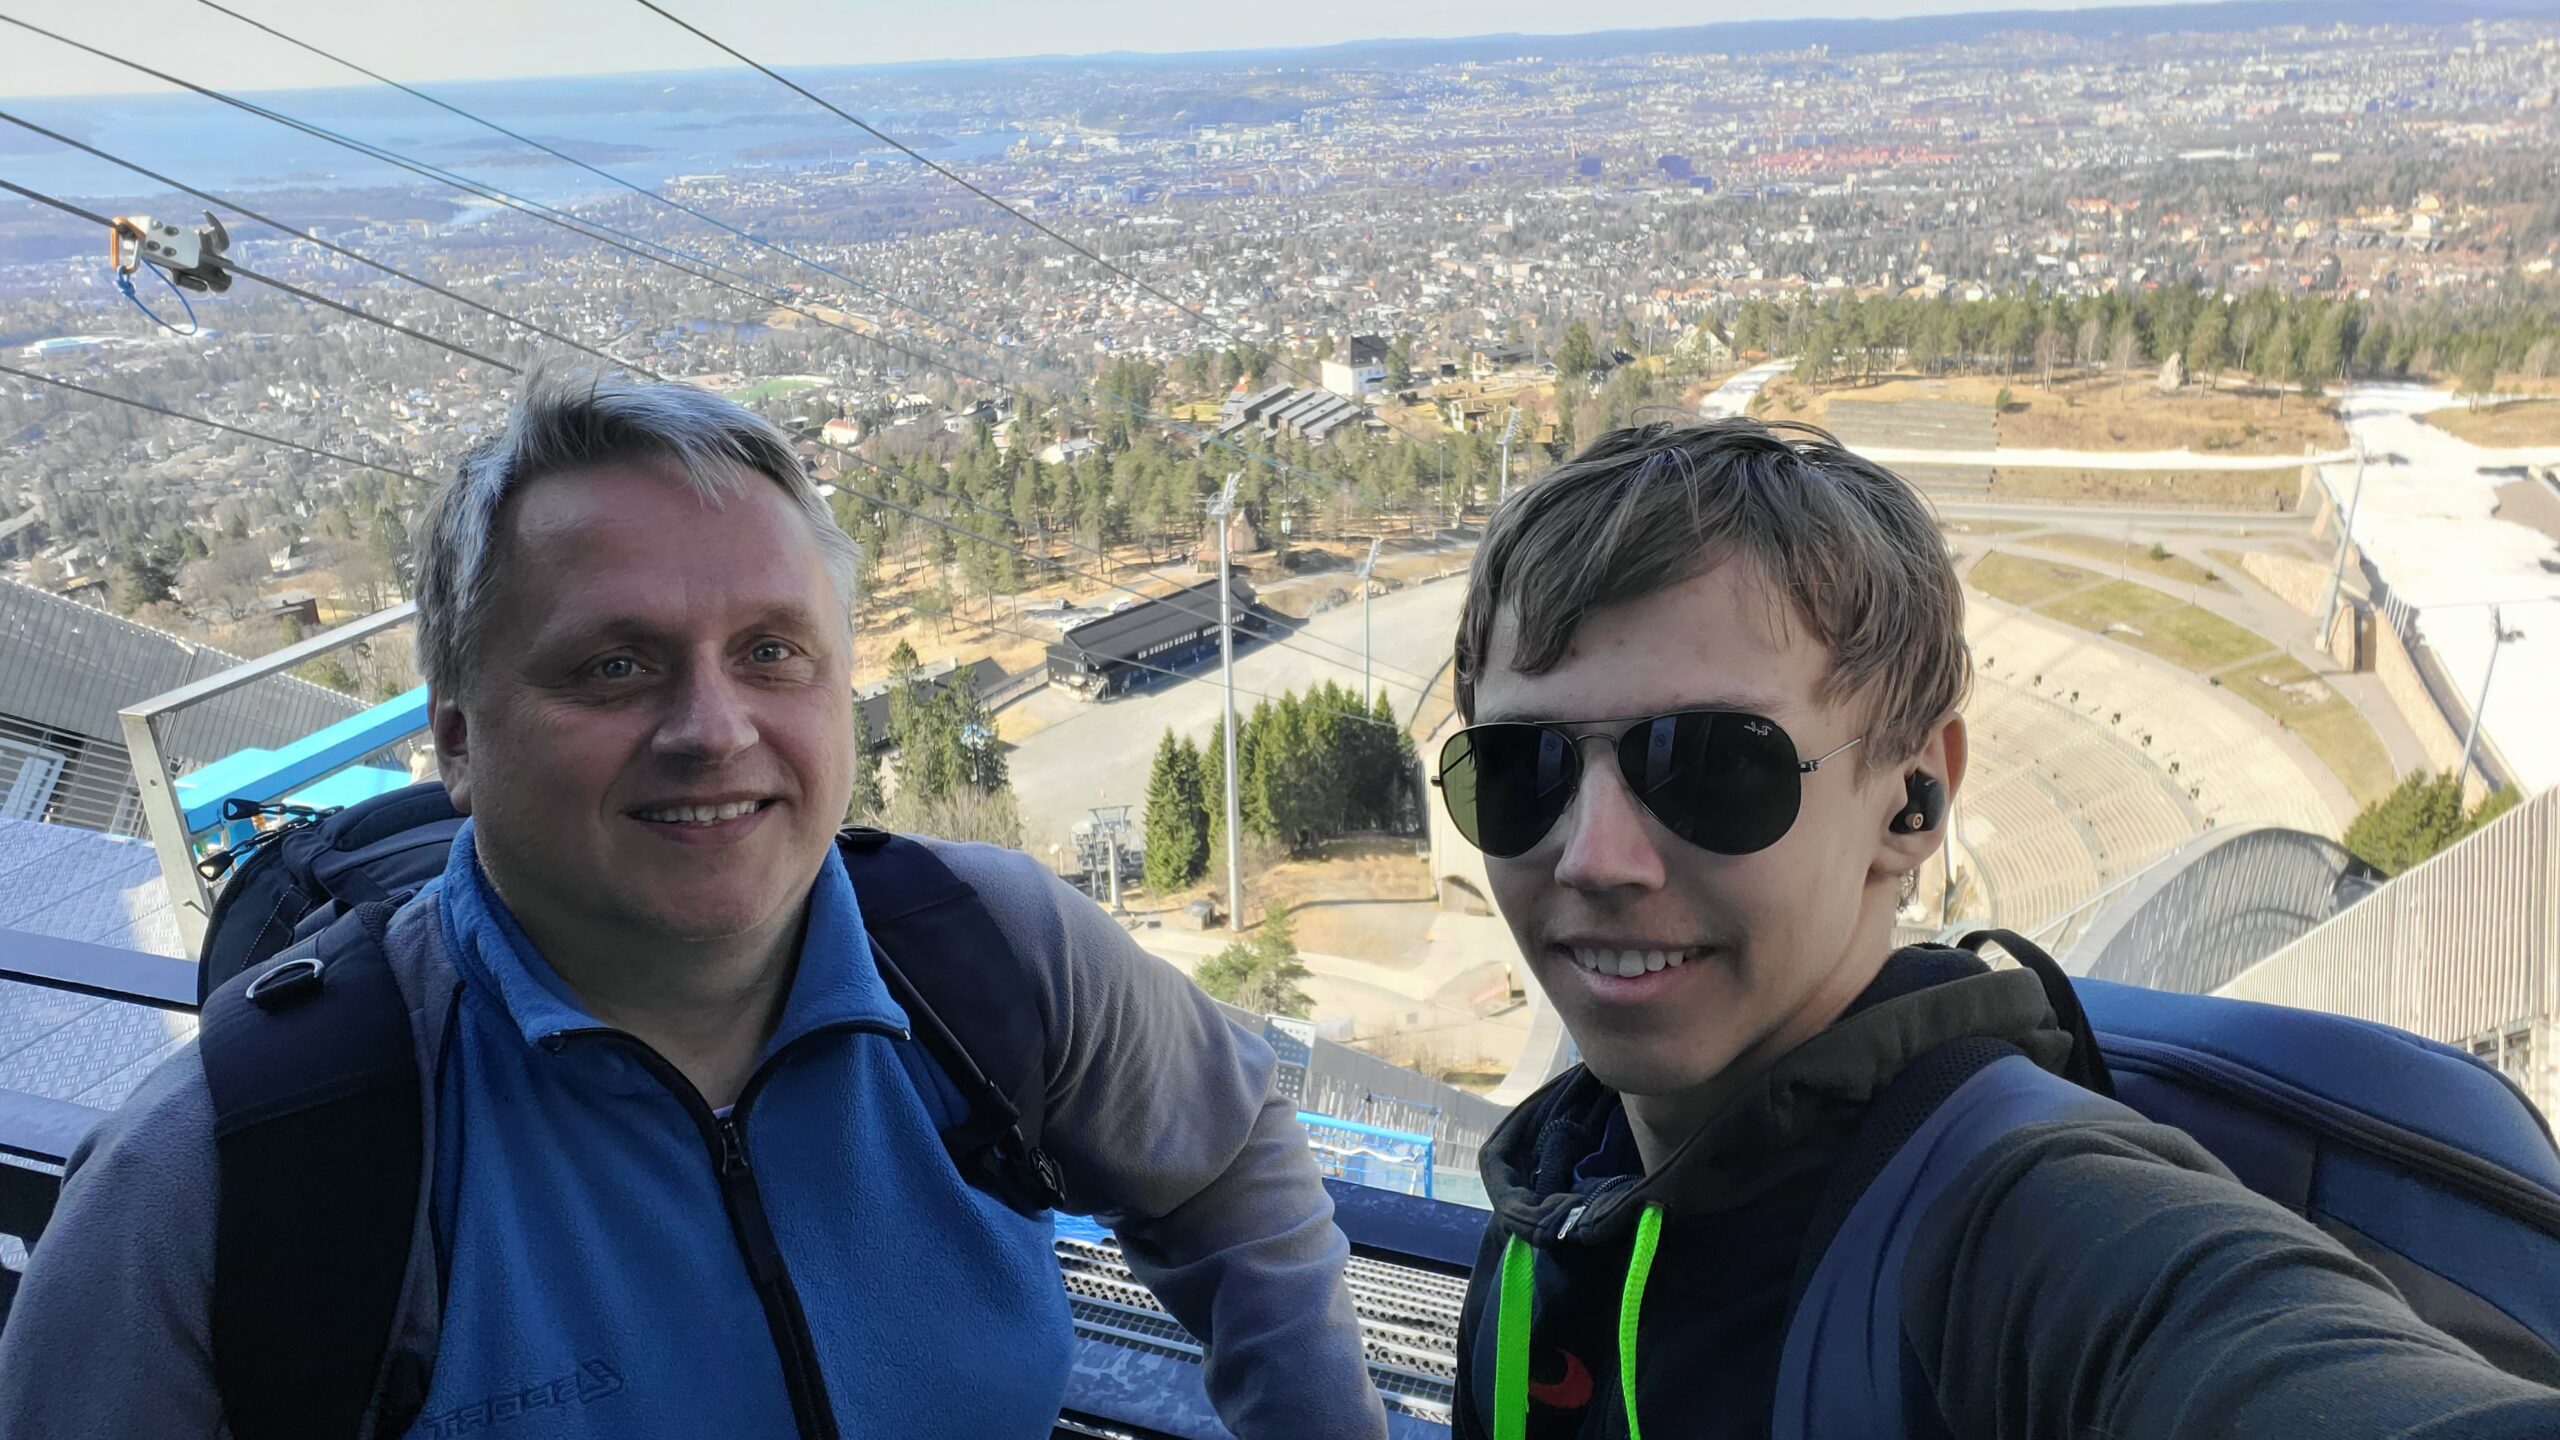
Holmenkollen360.com crew.
Do you need a world record? Hire us!
Graphics that emphasize the size


9000 x 4320 desktop
This panorama was edited on 55″ 8K display, but even this was to small and I had to extend the desktop to 9000 x 4320. Note that one and each of the tiny thumbnails represents 180MP image. This part is one of 4 parts which made the whole panorama.

About the technology
Short videos demonstrating the technology
- Unstabilised: Please note that the movement is dampened by the VR system. The VR system resets itself between shots, which is why the image moves so much.
- Registered: Pictures are aligned on top of each other. Please note the wobbling caused by atmospheric disturbance.
- Optical flow: The algorithm adjusts the pixels toward the average of all images.
- Stacked: The images are median-stacked, and the extra resolution is restored.
- Sharpened: Sharpening has been applied, and the image is ready.
One exposure vs sub-pixel aligment and processing.
This section presents before-and-after comparisons. The “before” images show a single exposure exactly as captured by the camera. Due to atmospheric disturbance, the image appears wobbly and distorted — which is clearly visible in the animation. The “after” images show the result after the full workflow has been applied, revealing the final detail, clarity, improved image quality, and higher resolution of the finished panorama.
Sailboats
One exposure
20 exposures, after processing
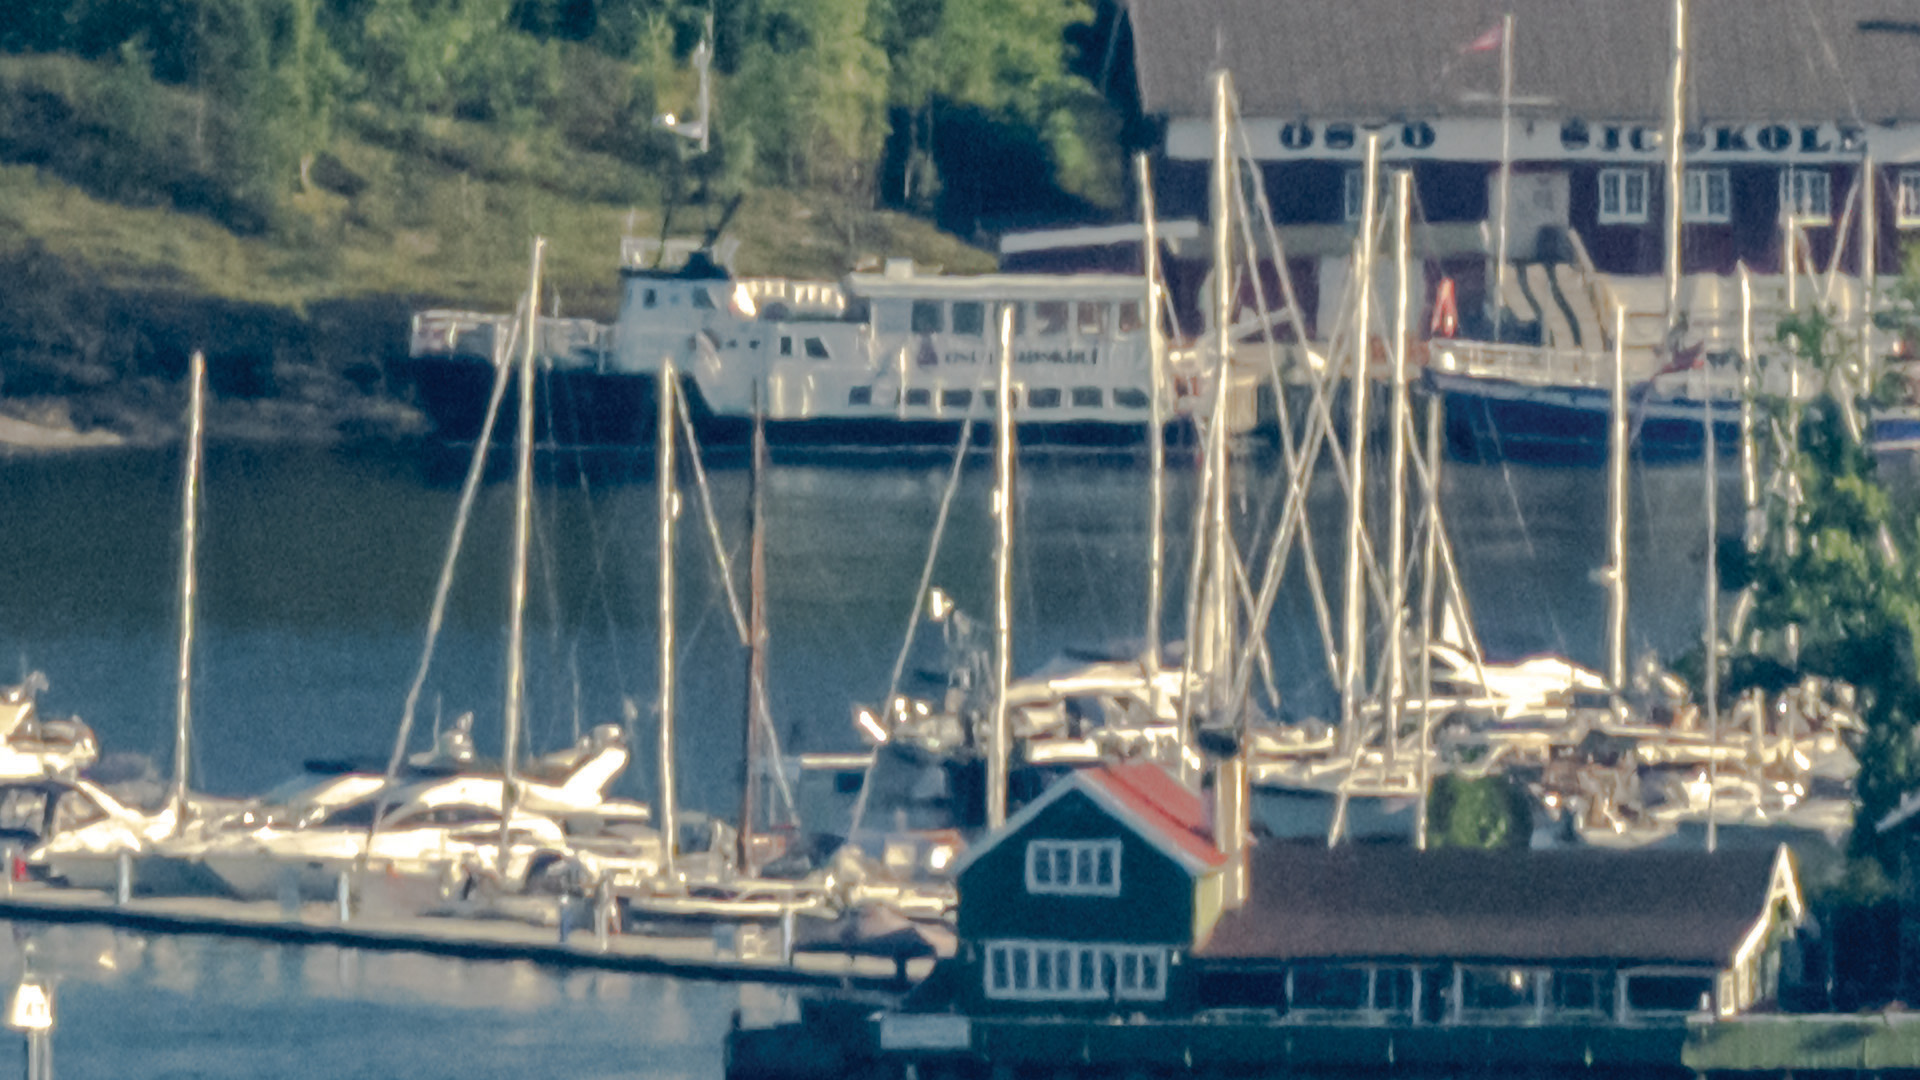
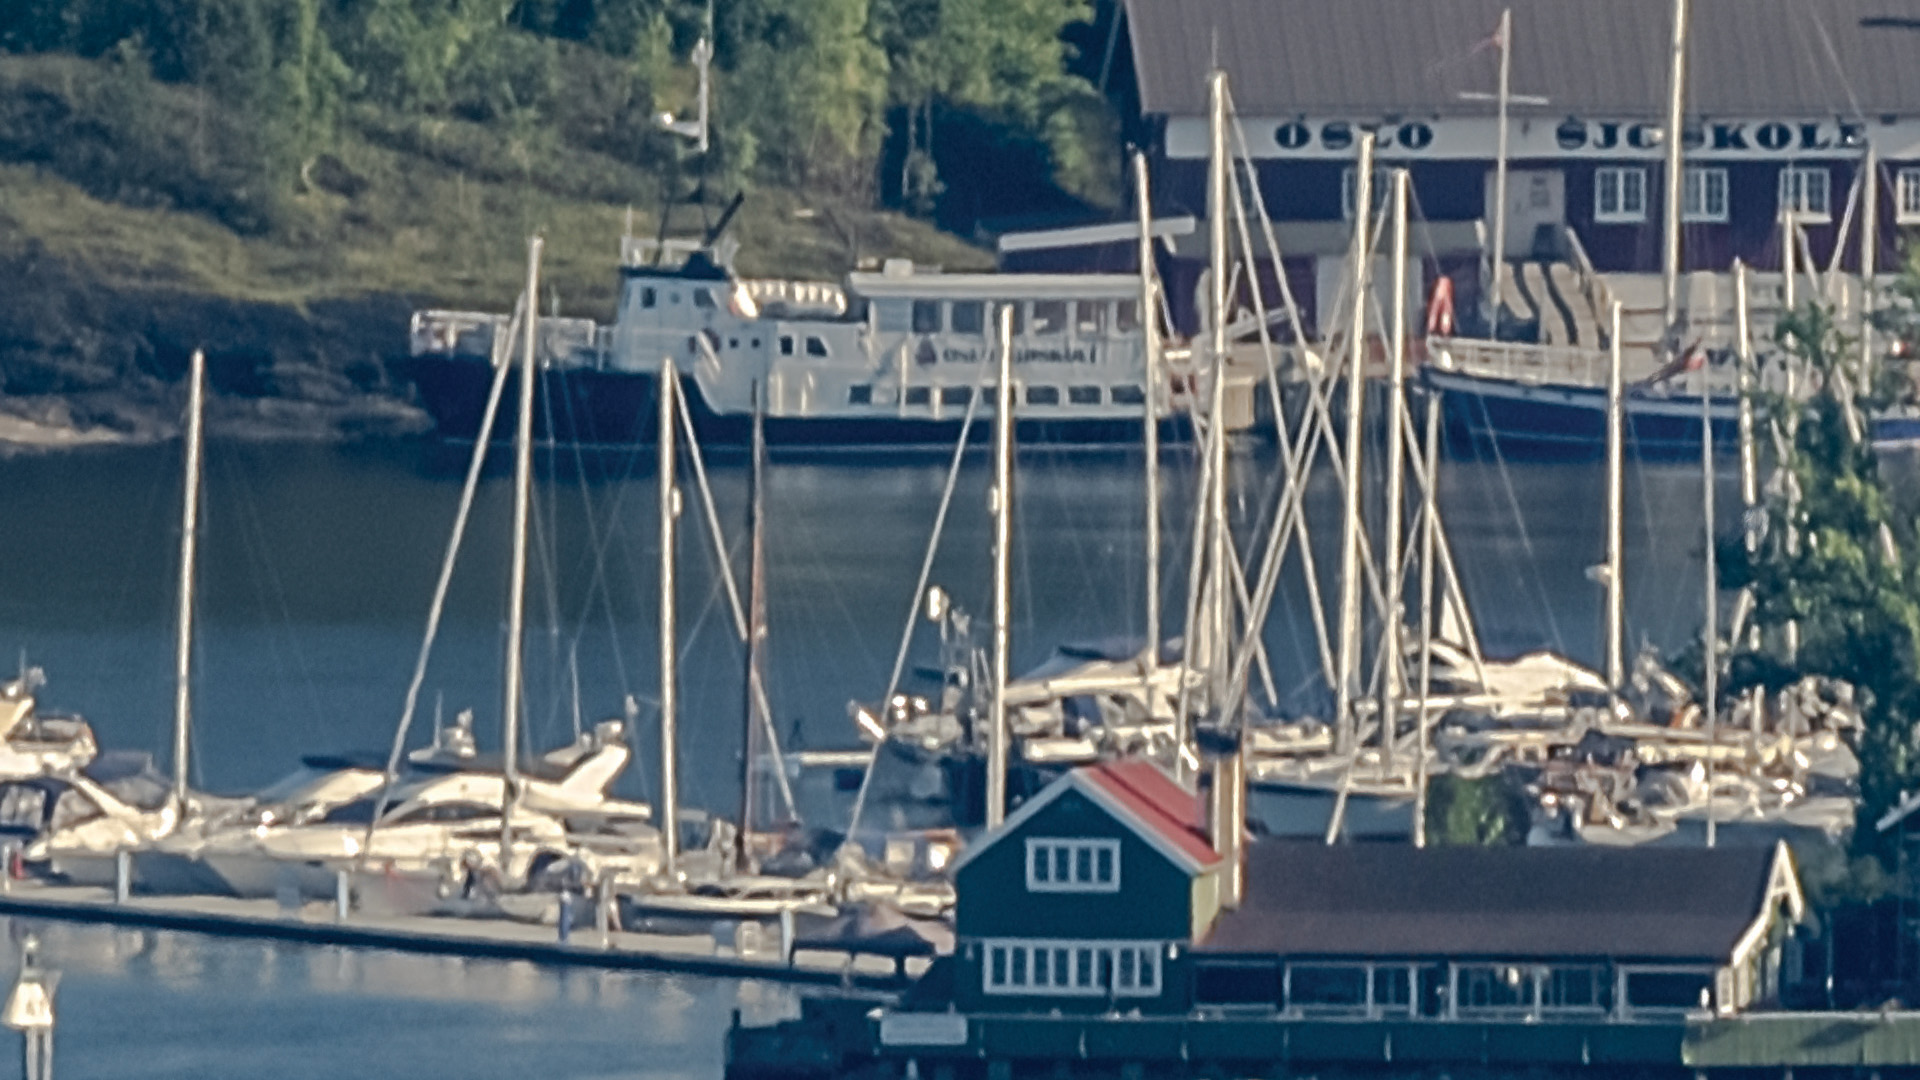
1 cm details at 8 km — why this shouldn’t be possible (but looks like it is)
Please bear in mind that the boats are ~8 km away. The wires on the sailboats are ≈1 cm thick. Seeing 1 cm details at 8 km should impress you, because it’s impossible —so what’s going on?
The left image is a single exposure. The right image is the final result after processing, upscaling, and sharpening. With an 800 mm f/11 lens on a 45 MP full-frame camera at 8 km, the theoretical diffraction-limited resolution is only about 7–10 cm.
Stacking and upscaling seem to reveal 1 cm “wires,” but that’s an optical illusion. The camera isn’t resolving the wire’s true thickness; it’s detecting tiny contrast changes. Even far below the resolution limit, a thin wire can block or scatter a little light and register as a one-pixel-wide dark or bright line. Sub-pixel alignment and upscaling enhance these edges, making the wire appear visible even though its width isn’t actually resolved. A 1 cm object might cover ~25% of a pixel, yet repeated frames, careful alignment, and sharpening can pull out that sub-pixel contrast—this image is a good example.
Why 1 cm “appears” visible at 8 km (short explanation):
- Diffraction limit (~7–10 cm at f/11, 800 mm): Sets the smallest resolvable detail, larger than 1 cm.
- Sub-pixel edge detection: Features smaller than a pixel still shift pixel intensities; edges are detectable even when widths aren’t resolved.
- Stacking (higher SNR) + super-resolution: Multiple frames let you align at sub-pixel precision, average out noise, and reconstruct sharper edges.
- Sharpening/deconvolution: Boosts contrast at those edges, making thin lines look distinct without truly measuring their thickness.
- Result: You’re seeing enhanced edge contrast from a < resolution-limit object—not a faithful 1 cm measurement at 8 km.
Urban intersection
One exposure
20 exposures, after processing
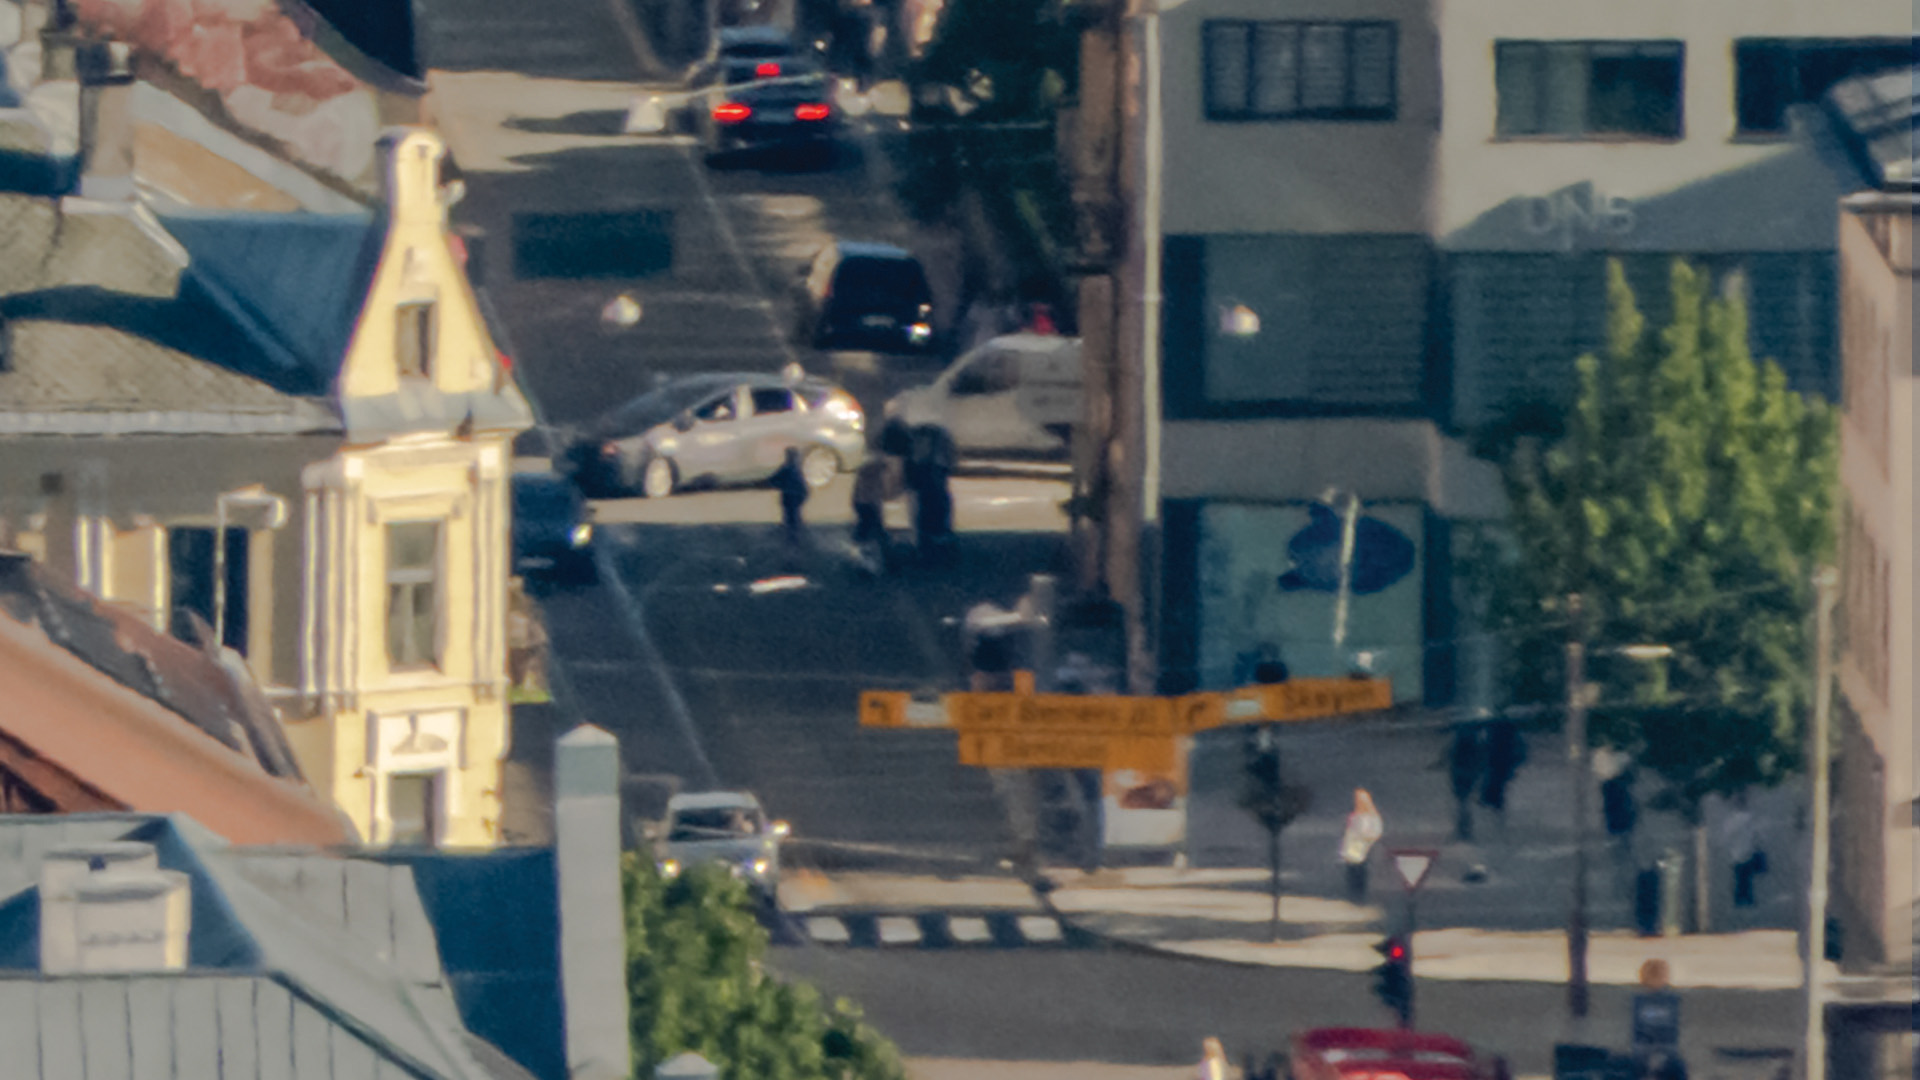
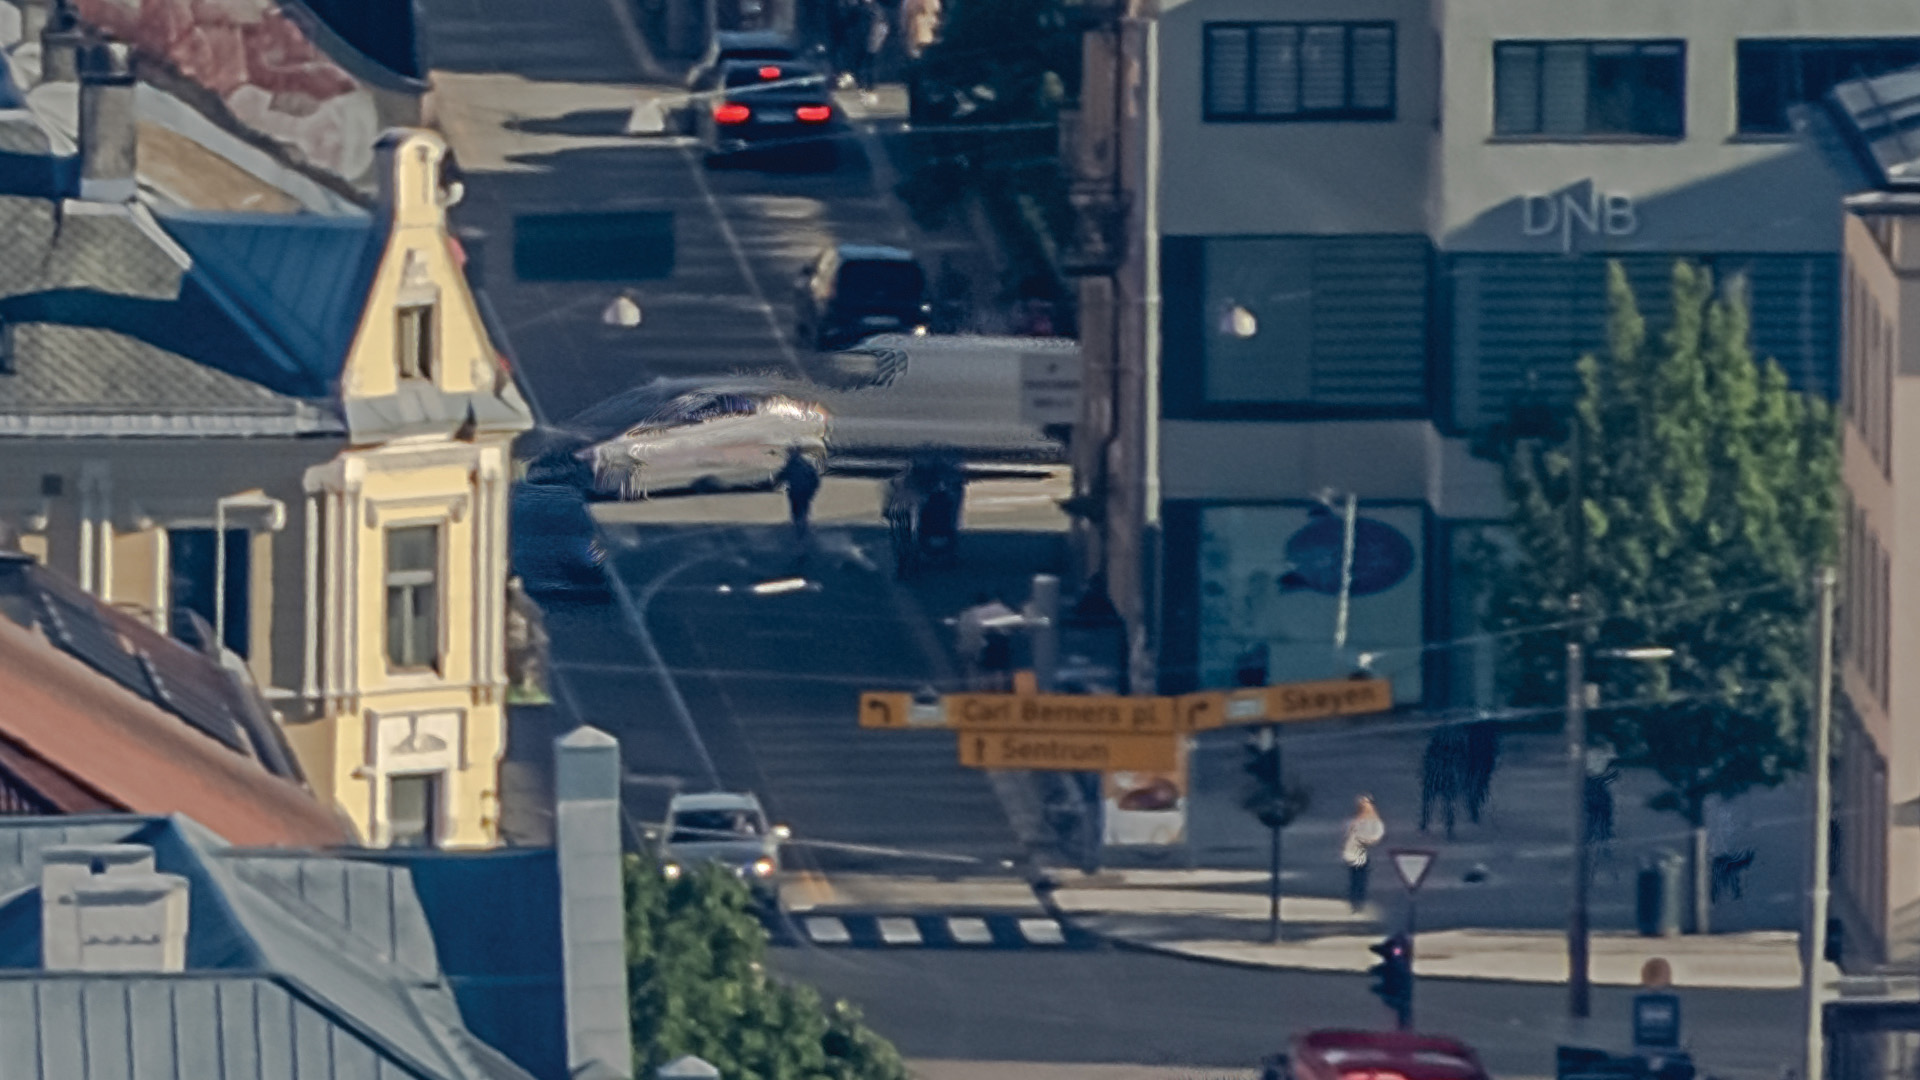
Object within theoretical resolving limits.
The image on left is one single exposure. The image on right is the final image after processing,
upscaling and sharpening. Distance to the signs is about 5 km. Letters in the signs are big enough
for camera to resolve and we see improved image quality. We see generally better quality everywhere in the image, as expected.